Low-cost website hosting with Amazon S3
Published
A while ago, I decided to ditch the traditional web hosting services (like HostGator and Bluehost) in favour of Amazon’s Simple Storage System (S3) . I was on a quest to find the most inexpensive solution to host my portfolio website. Instead of paying a flat rate of $3-$6 per month, S3 charges by usage and starts at as little as 3 cents per GB per month . The only catch is that it lacks the usual back-end services that are provided with a hosting package, such as WordPress, MySQL database and email accounts. For static websites (purely front-end) like a marketing site or a Jekyll blog , hosting on S3 is cost-effective with excellent up-time and minimal maintenance.
Assuming you’re comfortable with basic web development, this article will show you how to host a static website on Amazon S3 under a custom domain while using s3_website for painless deployment.
Setting up a S3 Bucket
First of all, let’s create an empty S3 bucket to store your website files.
Sign up for an Amazon Web Services account .
Head over to the AWS management console and navigate to S3.
Click Create Bucket and name the bucket the URL of your website (e.g., www.youdomain.com ) so you can link it with your domain later.
Under Static Website Hosting section on the right-hand pane, tick Enable website hosting. Also, keep note of the Endpoint URL, to be referenced later.
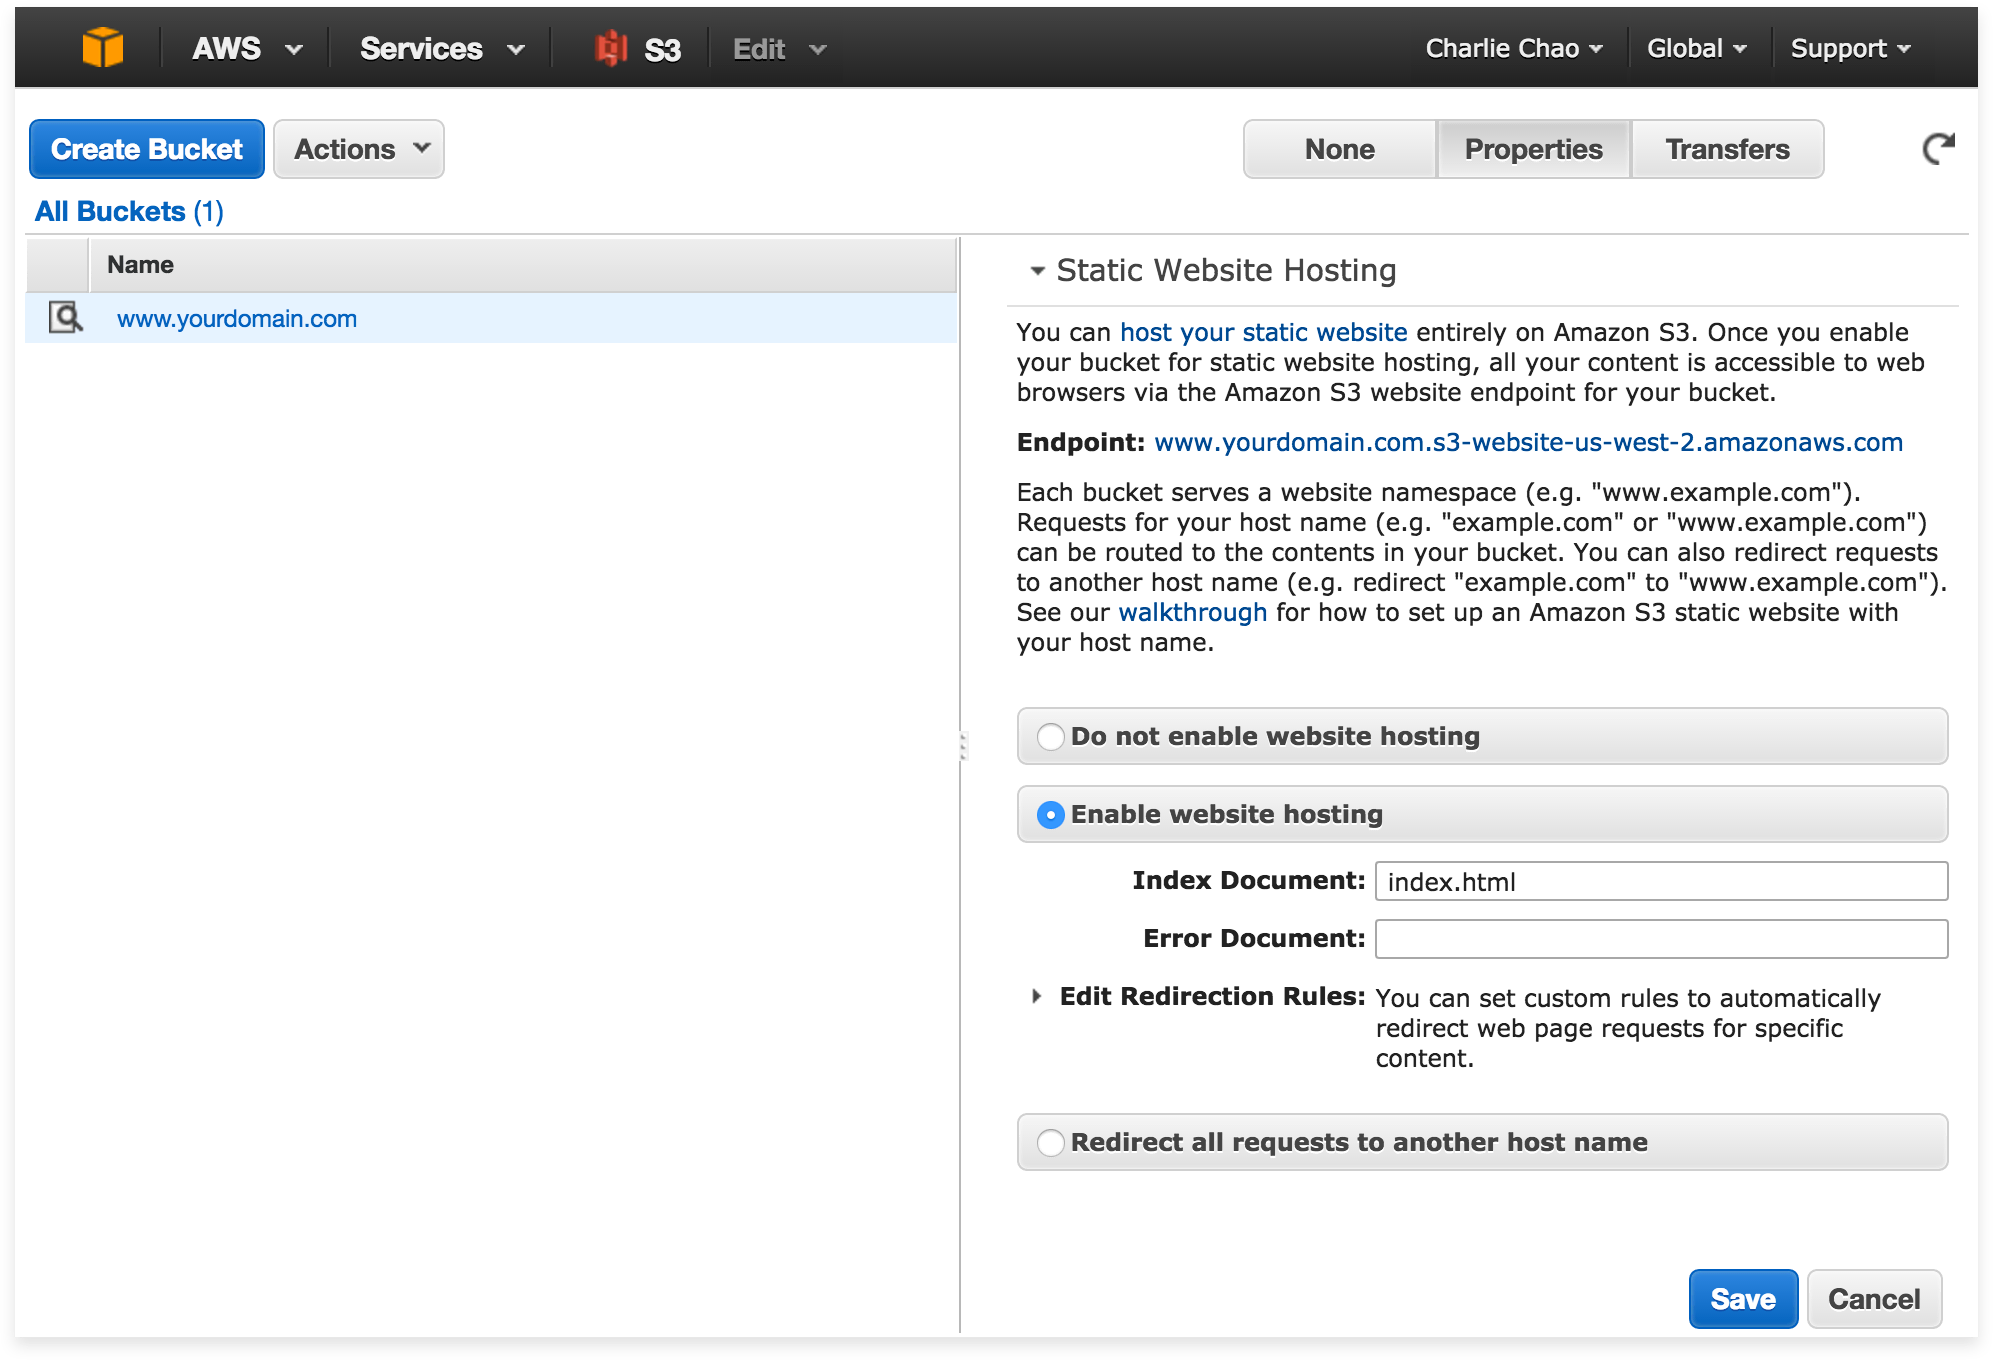 Above: Enabling website hosting for a bucket in the Properties pane.
Under Permissions section, click Add bucket policy. Copy and paste the policy code from below, which allows the public to be able to read the files you’ll put into the bucket. Replace www.yourdomain.com with your bucket name.
{
	"Version": "2012-10-17",
	"Statement": [
		{
			"Sid": "PublicReadGetObject",
			"Effect": "Allow",
			"Principal": "*",
			"Action": "s3:GetObject",
			"Resource": "arn:aws:s3:::www.yourdomain.com/*"
		}
	]
}
Setting up s3_website
With traditional web hosts, you would use the FTP protocol to upload your files. With S3, you’d need to use either their cumbersome web console, REST API, or a third-party tool to manage your files. Fortunately, there is a project called s3_website that can synchronize your website assets to your bucket by simply running a line of code through the terminal. The script requires Ruby and Java installed, so make sure they’re on your computer before going any further.
Open Terminal to your project folder and run:
gem install s3_website && s3_website cfg create.Open s3_website.yml and replace the first three lines with what’s below. Remember to change s3_bucketvalue to the name of your bucket.
s3_id: <%= ENV['S3_ID'] %>
s3_secret: <%= ENV['S3_SECRET'] %>
s3_bucket: www.yourdomain.com
Run the snippet below while replacing
YOUR_S3_ACCESS_ID_HEREandYOUR_S3_SECRET_HEREwith your actual ID and secret. This creates a separate configuration file that stores your access information. If you’re using Git, add .env to your .gitignore so it doesn’t get checked in and be hosted elsewhere.echo "S3_ID: YOUR_S3_ACCESS_ID_HERE" > .env echo "S3_SECRET: YOUR_S3_SECRET_HERE" >> .env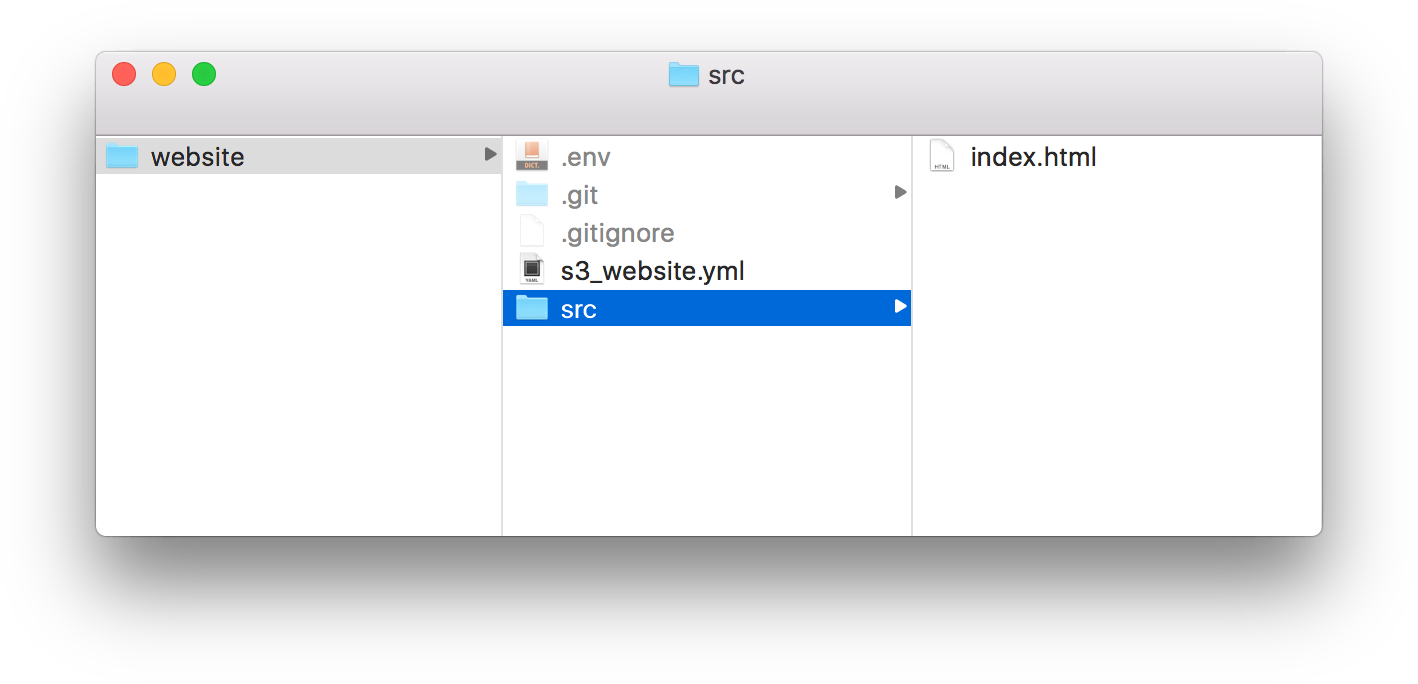 Above: An example of a project folder structure at this point (dot files are hidden in Finder by default).
That’s all for the bare essential configuration. You can create and store your website files inside a src/ folder (as an example) and run: s3_website push --dry-run --site src/.
The snippet above shows you how the script will modify your S3 bucket. Run the same command without --dry-run to actually commit the changes. This is how you’ll deploy your website without having to fiddle with UIs.
 Above: Running the deployment command using s3_website.
Enabling Cache and Gzip Compression
To save more money on your bucket, you can configure s3_website to add a Cache-control header to your uploaded files. This will ensure that certain files get cached in your visitor’s browsers instead of having them downloaded on every page load (thus, reducing the amount of GET requests). In your s3_website.yml, add the following:
max_age:
  "**/*.html": 21600 # 6 hours
  "**/*.css": 21600  # 6 hours
  "**/*.js": 21600   # 6 hours
  "**/*.png": 86400  # 1 day
  "**/*.gif": 86400  # 1 day
  "**/*.jpg": 86400  # 1 day
  "*.ico": 2592000  # 1 month
The key represents the path of files using glob patterns , relative to your src/ folder. The value is the cache duration in seconds. Keep the durations small if you plan to update your content regularly.
Another great feature s3_website has is automated gzipping . It compresses files that can be decoded by the visitor’s browser, thus reducing their storage size and speeding up page load. Enable it in your s3_website.yml by adding the following:
gzip:
  - .html
  - .css
  - .js
Finally, run the push command with --force parameter to update your existing files with the new settings.
Linking to Your Custom Domain
Assuming you want people to visit your domain through the www subdomain, you’ll need to create another bucket in the AWS console with the name yourdomain.com (without the www prefix). Then, under Static Website Hosting, tick Redirect all requests to another name and enter your domain with the www prefix.
Next, you’ll have to go to your domain registrar’s dashboard and add two entries to your domain’s DNS records :
CNAME record with host www and value of your bucket Endpoint URL.
URL Redirect Record with host @ and value of your domain with the www subdomain.
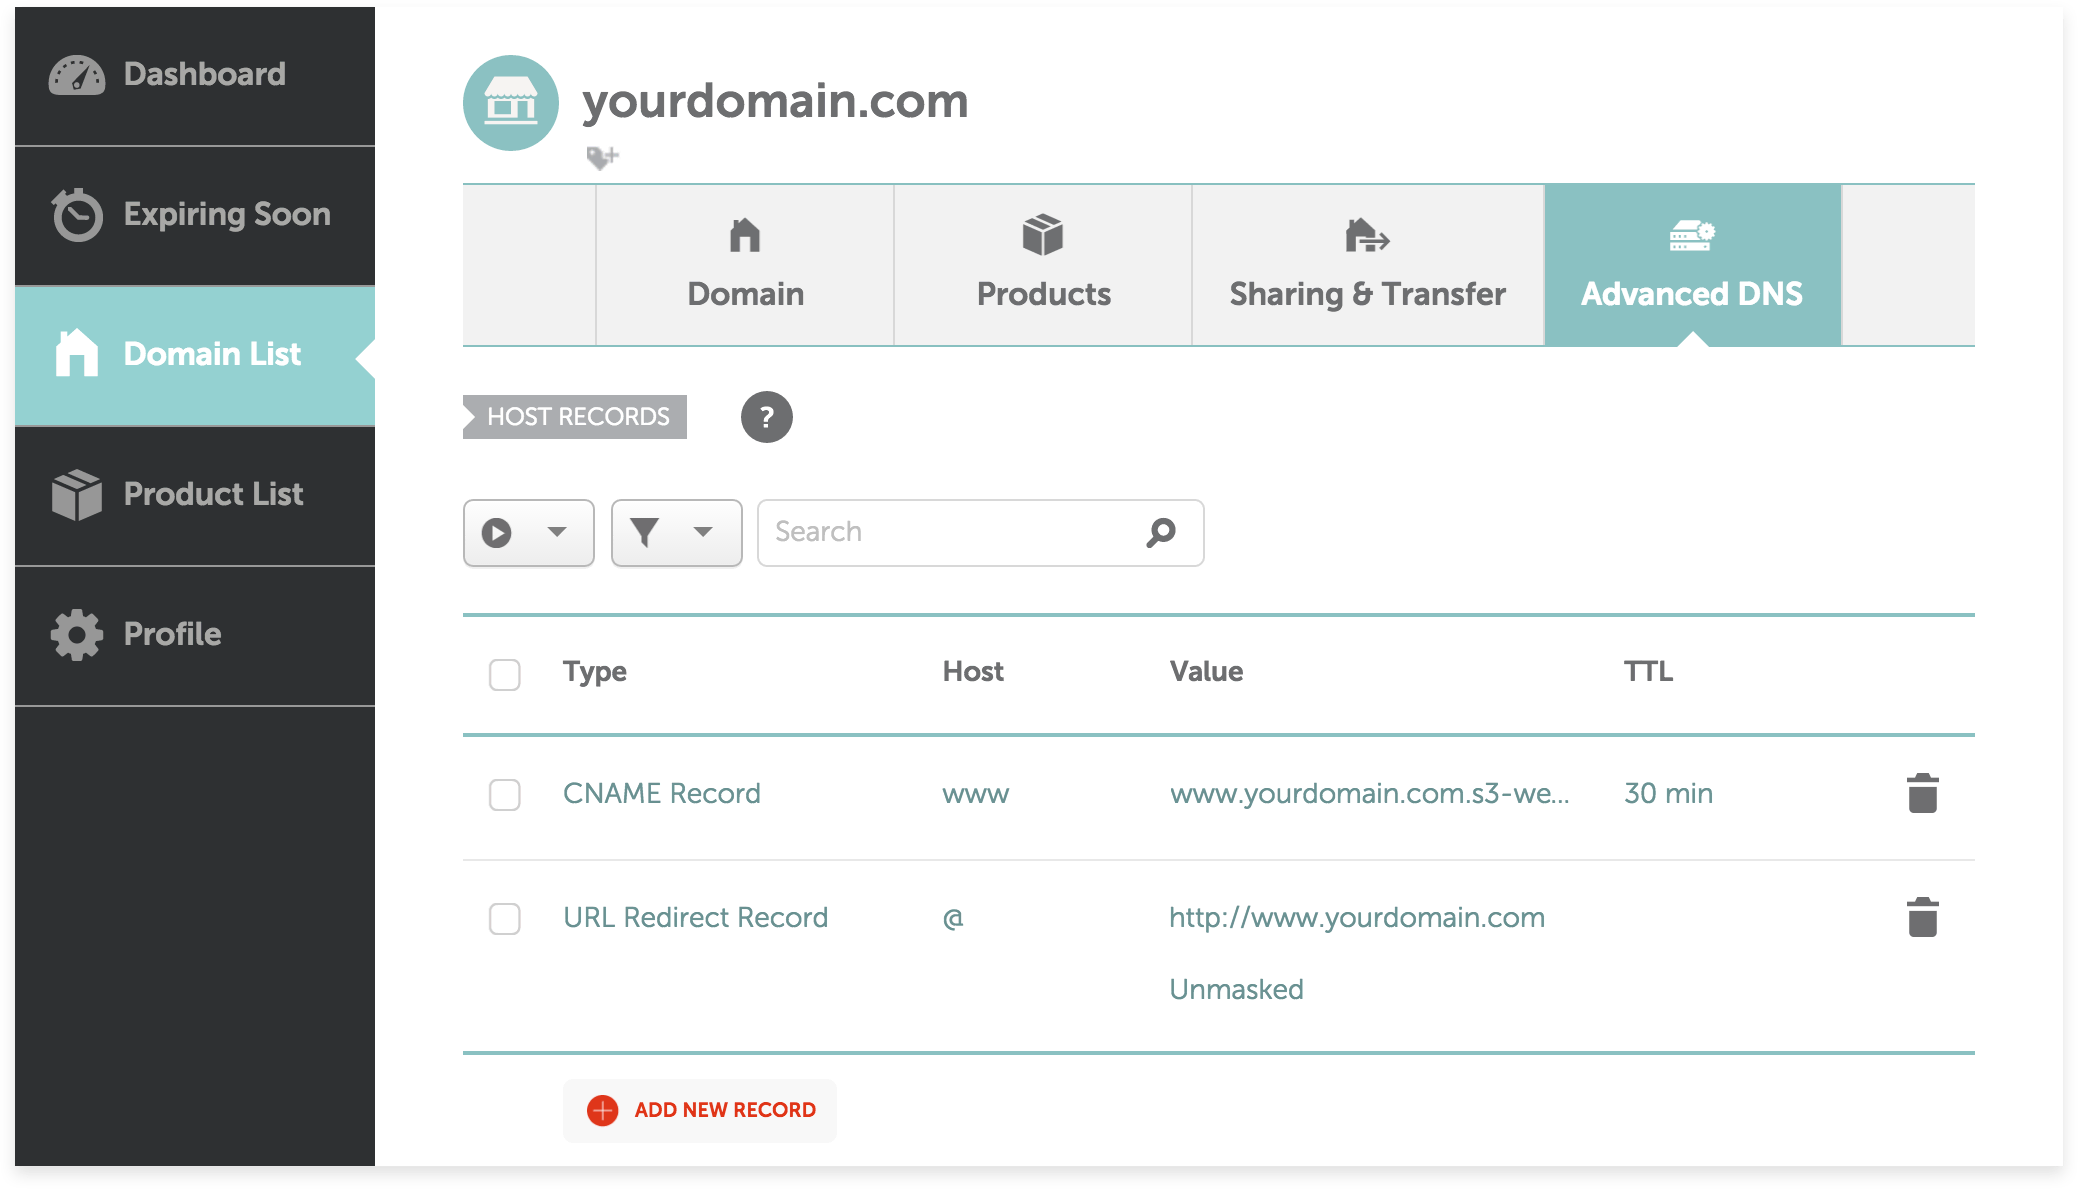 Above: An example of the configuration for a domain that points to a S3 bucket through Namecheap’s dashboard. If you’re using a different registrar, look up their knowledge base on how to access the DNS records.
Save your changes, and it should take a few minutes before the URL endpoints are live. Visit your website URL and make sure both www and non-www version works. If so, then you have successfully linked your S3 bucket to your domain!
Conclusion
And there you go: a highly affordable static website hosted on the reliable servers from Amazon. I’d like to give kudos to the contributors of s3_website , who made S3 a feasible hosting solution without the hassles of server ops.
So, what’s next? There are plenty of static site generators that can help you create and manage complicated websites. Perhaps an old WordPress-powered site of yours could be converted to take advantage of S3, saving you time and cost down the road.
Resources
Charlie Chao is a product designer who writes about design, development, and productivity. You can chat with me about this article on Bluesky and subscribe to the RSS feed for more updates. If you really enjoy my work, feel free to buy me a coffee 🙂